Setup Process of OpenVPN server with zentyal
abhishek-kumar
25 Aug 2016 06:33 AM
What is OpenVPN
Overview OpenVPN is open source software which means that everyone can freely use it and modify it as needed that implements virtual private network (VPN) techniques for creating secure point-to-point or site-to-site connections in routed or bridged configurations and remote access facilities. It uses a custom security protocol that utilizes SSL/TLS for key exchange. Zentyal Community Edition offers plenty of features to meet your needs, which includes OpenVPN also. 1. 0penVPN has the following advantages:- Authentication using public key infrastructure.
- SSL-based encryption technology.
- Clients available for Windows, Mac OS and Linux.
- Easier to install, configure and maintain than IPSec, another
- Configuration of a OpenVPN server with Zentyal.
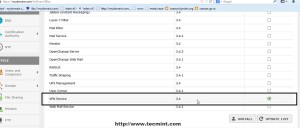 b) After OpenVPN package is successfully installed, navigate to Module Status and check VPN to enable the module.
 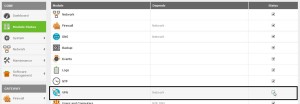 c) Accept the new pop-up which allows you to visualize system modifications then go up on page and hit Save Changes to apply new settings.
 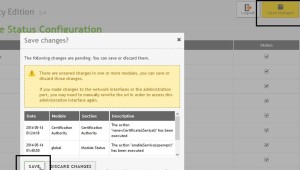 3.Configuration of a OpenVPN server with Zentyal Zentyal can be configured to support remote clients . This means a zentyal server acting as a gateway and VPN server, with multiple local area networks (LAN) behind it, allows external clients to connect to the local network via the VPN service
 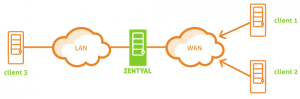 (In This Scenario both remote client want to connect with lan through openvpn) 4. Create a Certificate Authority and certificates: First, you need to create a Certification Authority for the two remote clients a) Go to Certificate Authority | General in the left navigation. (you will find the form to create the CA. You are required to fill in the Organization Name and Days to expire fields. Optionally, it is possible to specify the Country code , City and State.)
 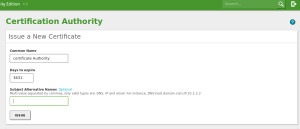 b)Fill out the information for the new certificate in the Issue A New Certificate section. c) Click the Issue button.
  (Once certificate issued, it will appear in the list of certificates.) d) After that Go to Certificate Authority | Server Certificate in the left navigation and enable zentyal Webadmin module
 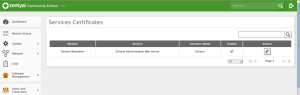 5.Setup the VPN server a) Go to VPN | Servers in the left navigation (you will be presented with an empty server listing. Click the Add New button to start the process of setting up your VPN server. Here are the steps for creating the VPN server)
 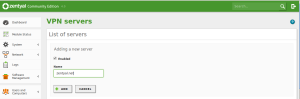 b) Give the server a name (this must be in the form domain.com). c) Click Add (This server is ready for configuration. By creating the server, zentyal automatically configures: port, protocol, certificate, and network address.) 6. Now you have to edit the configuration for this server: a)From within the server listing, click the Configuration button.
 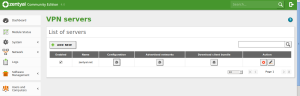 b)In this new screen, you can configure the VPN exactly how you need it . You can even reconfigure the default settings for the VPN created by Zentyal.
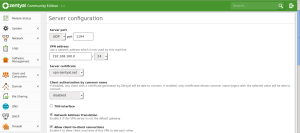
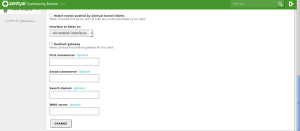 7. Configure the VPN the way you want it. You should pay close attention to these settings: a)VPN Address: This is the virtual subnet used by the VPN. Make sure this does not conflict with any other networks in use. b)Server Certificate: By default, this will be the certificate created by zentyal. You can import your own certificate from an external source, and then select that certificate here. c)Authorize The Client By The Common Name: You can select a string of characters from the drop-down that will require the common name of the client certificate is within order for authentication to succeed. d)TUN Interface: You can select either a TAP or TUN interface (TAP is default). e)Network Address Translation (NAT): If you need NAT, enable it here. Redirect Gateway: If you want to force all client network traffic to go through the VPN, check this box; otherwise, the clients will use their own resources for Internet traffic. f)Name Servers/WINS Server: If you want name/WINS servers to overwrite those used on the clients, configure them here. g)Click the Change button when your configuration is complete. (After you enter all of the necessary information, click the Save Changes button that's in the upper right corner. This will save all of your options and start the VPN server) 8. Open Firewall Ports: Before actually opening firewall to OpenVPN traffic the service must initially be defined for Zentyal Firewall. a) Navigate to Network | Services | Add New b) Enter a descriptive name for this service to remind you that is configured for OpenVPN and choose a Description then hit on Add. c) After you newly service appears in Services List hit on Configuration button to edit settings then hit on Add New on next screen
 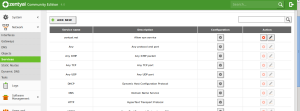 d) Use the following settings on VPN service configuration and when you are done hit on Add.
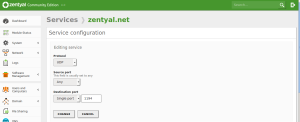
 - Protocol = UDP (if on VPN Server configuration you selected TCP protocol make sure you add a new service here with same port on TCP).
- Source Port = Any.
- Destination Port = 1194.
 e)After you added the required services click on upper Save Changes button to apply settings 9. Now it’s time to open Zentyal Firewall for OpenVPN connections: a)Go to Firewall | Packet Filter| Filter rules from Internal Network to Zentyal –Configure Rules and hit on Add New
 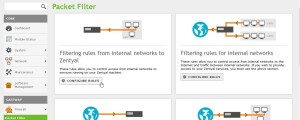 b)On the newly rule make the following settings and when you finished hit on Add
 - Decision = Accept
- Source = Any
- Service = your vpn service rule just configured
b)On the Download Client Bundle of your server use the following settings for a Windows machine then Download the client package. 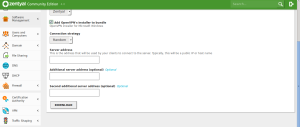
- Client Type = Windows (you can also choose Linux or Mac OS X)
- Client’s Certificate = Zentyal
- Check Add OpenVPN installer to bundle (this will include OpenVPN software installer)
- Connection Strategy = Random
- Server Address = ( public Internet IP Address)
- Additional Server Address = only if you have other public IP Address or leave blank
- Second Additional Server Address = same as Additional Server Address or leave blank
- For 32-bit Windows
- For 64-bit Windows
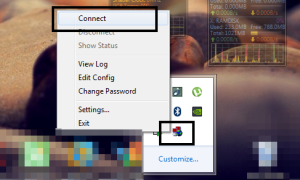 g) A pop-up window with your connection should appear on your desktop and after the connection successfully established on both tunnel endpoints, a window bubble will display this fact and show your VPN IP Address. h) Now you can test your connection by ping Zentyal VPN Server address or open a browser and check your domain name or VPN Server address in URL. Refrences : a) http://www.tecmint.com/install-openvpn-server-on-zentyal/ b) http://www.techrepublic.com/blog/smb-technologist/set-up-a-vpn- on-your-zentyal-small-business-server/